Difference between revisions of "Prevue (ESQ)"
m (The software has more than two modes... Thanks for taking the time to dump in all of this great info, though, whoever you are :)) |
|||
| Line 25: | Line 25: | ||
==Operation== | ==Operation== | ||
| − | The software has | + | The software has several different modes, which are accessible through the system's menu. To access the menu, press ESC while in listings mode. The keyboard commands that are available depend on which mode the software is in. While in Diagnostic mode, any keypress that is not recognized by the software as a valid command will dump back out to the main menu. |
===Listings mode=== | ===Listings mode=== | ||
Revision as of 13:30, 22 May 2010
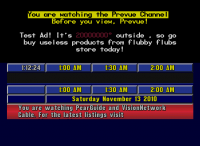
Prevue Grid, also known as "blue grid", was the final iteration of the Prevue software, used from 1993-1999. Like Prevue List and EPG Sr., Prevue Grid ran on the Amiga platform. There were many differences between these three Amiga-based software editions, however. Whereas Prevue List displayed a list of what was currently on on each channel, then what would be on in the future at different times, the Prevue Grid showed what was on each channel currently and in the future at the same time.
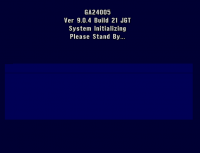
The Prevue Grid software had 3 different names over the course of its history: Prevue Guide, Prevue Channel, and lastly, for just a few months, TV Guide Channel. Only one version of the Prevue Grid software, which is thought to be the final version, is currently known to be on the internet. This is version 9.0.4, with TV Guide Channel branding.
YouTube clip: Blue Grid example
Specifications
This version of the Prevue Grid software requires the following minimum specifications:
- 2.04 or 2.05 Kickstart ROM
- Chip RAM: 1.0MB
- Fast RAM: 1.0MB
- CPU: 68000
- Chipset: ECS
When running it under emulation, it's a good idea to make the window size 760x480 - this causes the image to be perfectly centered in the window. To create screenshots with the proper aspect (to simulate what you'd get from a video capture on a real Amiga), crop the 760x480 screenshots down to 740x480, then resize it using a bilinear algorithm to 640x480.
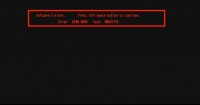
This particular Guru Meditation error is caused by insufficient chip RAM. Insufficient fast RAM will not cause a Guru Meditation, but it will cause the software to throw an ER011 error and freeze up. It is not compatible with Kickstart 3.1 - the software will boot, but there are major graphical problems. It is compatible with the AGA chipset, but requires softkicking with a 2.x ROM in order to avoid the glitches.
Operation
The software has several different modes, which are accessible through the system's menu. To access the menu, press ESC while in listings mode. The keyboard commands that are available depend on which mode the software is in. While in Diagnostic mode, any keypress that is not recognized by the software as a valid command will dump back out to the main menu.
Listings mode
Ctrl-B - this shows SCRLSPD = x to appear on the top half, showing the current scroll speed.
Ctrl-C - this causes the software to redraw the screen. This is not done cleanly - there are glitches while it happens, but it redraws the screen freshly.
Ctrl-D - this causes the scroll speed to decrease by one. This also allows access to the "disallowed" speeds 0 and 1.
Ctrl-E - this causes the scroll speed to increase by one. If you press Ctrl-B beforehand, the on-screen speed will change as well.
Ctrl-G - this causes the software to draw a calibration grid, useful for adjusting an attached monitor to ensure that none of the image is being cut off at the edges. If done in Listings mode, it can cause display corruption which will be repaired once the listings have a chance to cycle around. This works in Diagnostic mode too, but causes the software to erroneously begin using the listings font to draw the diagnostic menu, instead of the ad-editing font, causing text to be positioned incorrectly.
Ctrl-S - this causes the listings to switch into single-step mode. Each keypress of Ctrl-S from this point will make the listings scroll one step, then stop.
Ctrl-U - this will cause the software to disregard future keyboard input. The actual function of this command is unknown, but once the current "block" fully scrolls on the screen, the clock will stop and no more blocks will scroll onto the screen. Don't do this unless you wish to reboot, unless you can determine what it actually does.
C - this causes the current color palette to be displayed on top of the listings.
F - this causes text to appear on the top half denoting some internal settings. It is currently unknown how to modify these settings.
G - this triggers graphical ad mode, which currently goes through all the banners present on the disk.
N - this causes the top half to go black. Whether this is pass-through video mode, or solid black, is unknown.
S - this causes the listings scroll to continue.
Y - this causes the software to cycle through 32 colors on the top half, even though the hires screenmode normally in use only allows 16 colors. Press it 32 times to return to the "normal" palette.
/ - this cycles through 9 "Viewmode" tests on the top half. They cycle through different resolutions and different positions (left half, right half, full screen).
Shift-A - this causes text ads to appear on the top half, and will cycle through all ads that are marked "active" through the menu.
Shift-D - causes the software to read from track 51. Unknown what data it is reading.
Shift-K - causes the software to alternately read from track 62, then track 6. Unknown what data it is reading.
Shift-N - this causes some diagnostic text stating "BitPlane1 = 40468" to appear over the listings. Unsure as to the reason this exists.
Shift-S - this causes the listings scroll to stop.
Shift-T - this seems to have the same effect as Shift-A at the moment. It is unknown what difference there is to Shift-A.
Diagnostic mode
Shift-1 - Changes TEXT between L, S, N, and R. I assume L means Local, unsure about the others but it's possible that either S (serial) or R (RS-232) refers to feeding ads in over serial.
Shift-2 - Changes VIN between L, I, Z, N, Y, and y. Perhaps VIN refers to Video INput? Conjecture at this point without a manual or some good old RE'ing.
Shift-3 - Changes LINE between 6, 5, 4, and 3. This controls the maximum number of text lines per ad.
Shift-4 - Changes GRPH between L, R, S, N, and Y. Once again, unsure what this means, perhaps it allows the PowerPacked IFF files to come in from another source, allowing graphic updates without exposing the UI to the viewer?
Shift-9 - Causes a brief pop-up above the visual indicators for these settings that says Start TAPE Video. This would undoubtedly be used to test the functionality allowing locals video ads to run on the top half, because of the next item...
Shift-0 - Causes a brief pop-up in the same spot as Shift-9 that says Stop.
1 - Causes KHHR to change to Silence, but this does not persist when you re-enter the diagnostic screen.
2 - Causes Left to appear in this spot.
3 - Causes Right to appear in this spot. Looks like it might be used to test the audio source that goes to air?
4 - Causes Background to appear in this spot.
5 - Causes Ext. Video Only to appear haphazardly over the "Press any key to continue." prompt.
6 - Causes Computer Only to appear there.
7 - Causes Overlay Ext. Video to appear there.
8 - Causes Negative Video to appear there.
9 - Causes Video Switch Open to appear where the earlier Start and Stop message did.
Ctrl-A - Shows all free RAM types.
Ctrl-C - Shows free chip RAM.
Ctrl-F - Shows free fast RAM.
Ctrl-M - Shows largest contiguous block of RAM.


